
Tropical Kiwi Bliss Popsicles: A Refreshing Homemade Treat
As the warm weather approaches, the allure of homemade popsicles becomes irresistible. These delightful frozen treats are not just for children; they offer a refreshing escape for adults as well. In recent years, the trend of creating homemade popsicles has gained momentum, largely due to the ability to control ingredients and customize flavors. Among the plethora of options, the Tropical Kiwi Bliss Popsicles stand out with their vibrant colors and tropical flavors, making them the perfect choice for cooling off on a hot day.
This recipe is not only delicious, but it also provides numerous health benefits. Kiwis are packed with vitamins and antioxidants, while coconut water is renowned for its hydrating properties. Together, these ingredients create a popsicle that is as nutritious as it is satisfying. Whether you’re a novice in the kitchen or a seasoned home cook, this simple recipe ensures that you can whip up a batch of these popsicles in no time.
Understanding the Ingredients
To create the Tropical Kiwi Bliss Popsicles, it’s essential to understand the role each ingredient plays in this refreshing recipe. Here’s a detailed breakdown:
1. Ripe Kiwis: The star of this popsicle is undoubtedly the kiwi. Known for its vibrant green color and unique tart-sweet flavor, ripe kiwis are a powerhouse of nutrition. They are rich in vitamin C, vitamin K, and dietary fiber, making them an excellent choice for a healthy treat. When selecting kiwis, look for those that yield slightly to pressure, indicating ripeness. If fresh kiwis are unavailable, you can substitute with other tropical fruits like mangoes or pineapples, but the signature tartness of kiwis is hard to replicate.
2. Coconut Water: This natural beverage is not just a trendy hydration option; it enhances the popsicle’s flavor while providing essential electrolytes. Coconut water is low in calories and contains potassium, which can help replenish electrolytes lost during hot summer days. When using coconut water, opt for unsweetened varieties to keep the popsicles healthy and let the natural sweetness of the fruit shine through.
3. Honey or Agave Syrup: To sweeten the popsicles, you can use either honey or agave syrup. Both are natural sweeteners that provide a healthier alternative to refined sugars. Honey adds a floral note, while agave syrup has a milder flavor. Make sure to consider dietary preferences; for a vegan option, agave syrup is the way to go. The amount of sweetener can be adjusted based on personal taste and the natural sweetness of the kiwis.
4. Fresh Lime Juice: A splash of fresh lime juice not only enhances the flavor but also adds acidity, which balances the sweetness of the kiwis and honey/agave. Lime juice is also rich in vitamin C and offers a refreshing zest that complements the tropical theme of the popsicles. For an alternative, lemon juice can be used, but it will impart a slightly different flavor profile.
5. Fresh Mint Leaves: Mint is optional but highly recommended for its ability to elevate the overall flavor of the popsicle. Its refreshing taste pairs wonderfully with the sweetness of the fruit and the creaminess of the coconut water. Additionally, mint has digestive benefits and can help cool the body, making these popsicles even more appealing during hot weather.
6. Optional Garnishes: For those looking to add a touch of elegance, consider garnishing the popsicles with additional kiwi slices, a sprinkle of toasted coconut, or a few mint leaves. These garnishes not only enhance the visual appeal but also provide an extra layer of flavor, making your Tropical Kiwi Bliss Popsicles even more delightful.
Preparation Process
Now that you have a thorough understanding of the ingredients, let’s dive into the preparation process. This step-by-step guide will ensure that your Tropical Kiwi Bliss Popsicles turn out perfectly every time.
1. Preparing the Kiwi Mixture: Start by peeling and chopping the ripe kiwis into smaller pieces. This will make them easier to blend. Place the chopped kiwis in a blender or food processor. Blend on high speed until you achieve a smooth consistency. Depending on your texture preference, you may choose to blend until completely smooth or leave a few small chunks for added texture.
2. Incorporating Mint: Once the kiwi mixture is ready, add a handful of fresh mint leaves to the blender. Pulsing the mint into the mixture instead of blending it completely will help retain some of the mint’s vibrant flavor and color. This technique allows the mint to enhance the popsicle without overpowering the kiwi.
3. Adjusting Sweetness: Taste the mixture after adding the mint, and adjust the sweetness according to your preference. If you find it too tart, add honey or agave syrup gradually, blending after each addition until you reach the desired sweetness. Remember that the popsicles will taste less sweet once frozen, so aim for a slightly sweeter mixture than you would typically enjoy.
4. Tips for a Smooth Popsicle Experience: To ensure a smooth texture in your popsicles, it’s crucial to blend thoroughly. If you prefer a chunkier texture, you can reserve some of the chopped kiwi to fold in after blending. Additionally, when pouring the mixture into the molds, take care to avoid air bubbles by filling slowly or tapping the molds gently on the counter. This will help achieve a uniform texture without any icy pockets.
Filling and Freezing the Popsicles
Once your mixture is ready, it’s time to fill the molds. Here’s how to do it correctly:
– Filling the Molds: Carefully pour the kiwi mixture into your popsicle molds, leaving a small space at the top to allow for expansion as the mixture freezes. If you’re using popsicle sticks, insert them into the molds before placing them in the freezer. If your molds come with lids, secure them to prevent spills and ensure even freezing.
– Freezing: Place the filled molds in the freezer for at least 4-6 hours, or until completely frozen. For best results, it’s ideal to leave them overnight. When ready to enjoy, run warm water over the outside of the molds for a few seconds to help release the popsicles.
This detailed introduction and preparation guide lays the foundation for creating your own Tropical Kiwi Bliss Popsicles, ensuring that you have all the knowledge and tools needed for a successful outcome. Stay tuned for the next part of the article, where we will explore tips for serving and enjoying these delightful treats!
{{image_2}}
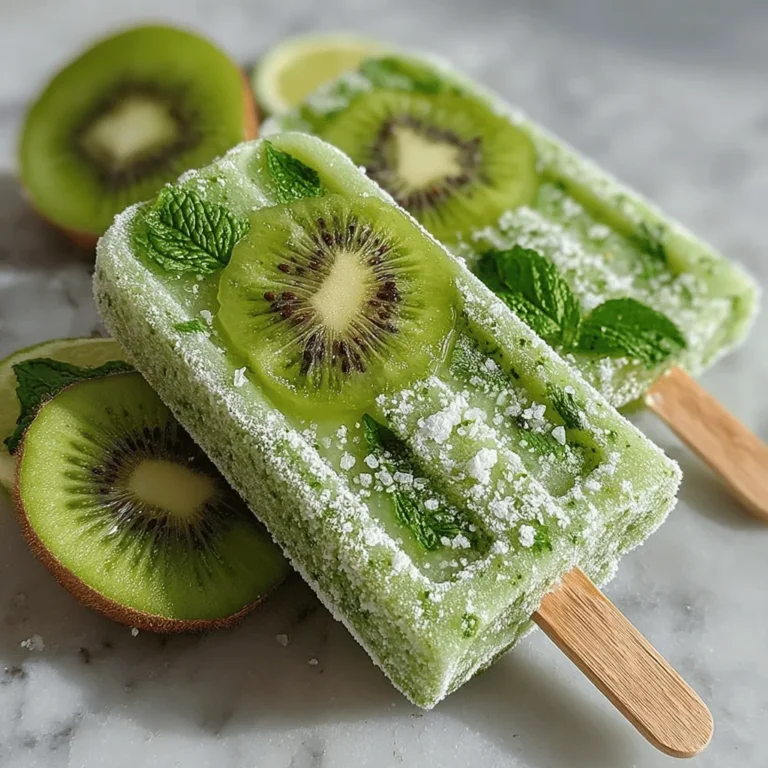
Importance of Garnishing for Flavor and Presentation
Garnishing your Tropical Kiwi Bliss Popsicles not only enhances their visual appeal but also adds an extra layer of flavor that can elevate your treat from ordinary to extraordinary. Fresh mint leaves are a wonderful choice for garnishing, adding a pop of color and a refreshing aroma. You can also consider sprinkling some shredded coconut on top right before serving to enhance the tropical theme and provide a delightful texture contrast. A few slices of fresh kiwi or a drizzle of honey can make your popsicles not just look appetizing but also more flavorful, enticing both kids and adults alike.
Detailed Instructions on Inserting Sticks and the Freezing Process
Once your kiwi mixture is blended to perfection, it’s time to fill your popsicle molds. Here’s a step-by-step guide on how to insert the sticks and ensure that your popsicles freeze evenly:
1. Fill the Molds: Carefully pour the blended kiwi mixture into popsicle molds, leaving about half an inch of space at the top to allow for expansion as the mixture freezes.
2. Insert the Sticks: After filling the molds, insert the popsicle sticks into the center of each mold. If you’re using wooden sticks, make sure they are as vertical as possible to ensure easy handling when serving.
3. Cover the Molds: If your popsicle molds come with a cover, place it on top to help keep the sticks in place. If not, you can use a piece of aluminum foil to cover the molds, poking a small hole in the center of each one to hold the sticks upright.
4. Freezing: Place the filled molds in the freezer. The ideal freezing temperature is around 0°F (-18°C) to ensure a solid freeze.
Explanation of Freezing Time and How to Tell When Popsicles Are Ready
The freezing time for your Tropical Kiwi Bliss Popsicles typically ranges from 4 to 6 hours, depending on your freezer’s efficiency. To check if they are ready, gently wiggle the popsicle stick; if it moves freely and the popsicle feels solid, it’s time to unmold them. Another method is to run a knife or your finger along the side of the mold to see if the popsicle pulls away easily. If it does, they’re good to go!
Unmolding and Serving
Successfully unmolding your popsicles without damaging them can be a bit tricky, but with the right techniques, you’ll become a pro in no time.
Techniques for Successfully Unmolding the Popsicles Without Damage
1. Warm Water Method: The most common technique is to run the popsicle molds under warm water for about 10-15 seconds. This slight warmth will help loosen the popsicles from the molds.
2. Gentle Twisting: After running them under warm water, gently twist the stick while pulling upward. This motion should help release the popsicle without breaking it.
3. Use a Knife: If the popsicle remains stuck, carefully insert a thin knife along the edges of the mold. Be cautious not to damage the popsicle while doing this.
Serving Suggestions for Various Occasions
These Tropical Kiwi Bliss Popsicles are perfect for a variety of occasions, from summer parties to casual family gatherings. Serve them at birthday celebrations or as a refreshing treat after a backyard barbecue. They also make a delightful snack for kids after school or a healthy dessert option for family movie nights.
Ideas for Pairing with Other Snacks or Drinks
Pair these popsicles with light snacks such as coconut chips or a fruit platter featuring tropical favorites like mango and pineapple. For a refreshing drink, serve them alongside coconut water or a light iced tea infused with mint. The combination of flavors will create a cohesive tropical experience for your guests.
Health Benefits of Tropical Kiwi Bliss Popsicles
Not only are these popsicles delicious, but they are also packed with health benefits thanks to their wholesome ingredients.
Nutritional Analysis of Key Ingredients
– Kiwi: Rich in vitamin C, fiber, and antioxidants, kiwis are known to boost the immune system and improve digestive health. One medium kiwi provides more vitamin C than an orange!
– Coconut Water: This hydrating ingredient is low in calories and high in potassium, making it an excellent choice for replenishing electrolytes, especially on hot days.
– Mint: Beyond its refreshing flavor, mint is full of antioxidants and can aid in digestion, making it a perfect addition to these popsicles.
Role of These Popsicles in a Balanced Diet
Incorporating Tropical Kiwi Bliss Popsicles into your diet can offer a guilt-free dessert option. Made with natural ingredients and free from artificial additives, these popsicles are a smart choice for those looking to satisfy their sweet tooth without compromising their health.
Creative Variations and Customizations
One of the best aspects of making popsicles at home is the ability to experiment with different flavors and textures. Here are some creative variations for your Tropical Kiwi Bliss Popsicles:
Suggestions for Ingredient Substitutions
– Different Fruits: Feel free to swap the kiwi for other fruits like strawberries, mangoes, or peaches. Each fruit will provide a unique flavor profile while maintaining the tropical essence.
– Alternative Sweeteners: If you prefer a different sweetness level, consider using agave syrup, maple syrup, or stevia as substitutes for honey.
Flavor Combinations to Experiment With
Mixing flavors can create exciting new taste experiences. Try combining kiwi with pineapple for a tangy twist or mango for a creamy, tropical flavor. Adding some lime juice can also enhance the fruity taste and give it a zesty kick.
Ideas for Adding Textures
For a unique twist on your popsicles, consider adding textures like yogurt for creaminess or chia seeds for a nutritious crunch. Layering your popsicle mixture with yogurt can also create a stunning visual effect that’s sure to impress.
Conclusion
The joy of making homemade Tropical Kiwi Bliss Popsicles extends beyond just their refreshing taste. These popsicles are a wonderful way to enjoy the sweet and tangy flavor of kiwis while taking advantage of the health benefits they offer. Their versatility allows you to get creative with flavors and textures, making them perfect for any occasion.
Whether you’re enjoying them on a warm summer day or serving them at a gathering, these delightful treats are sure to impress your family and friends. So grab your ingredients, follow the recipe, and indulge in the delightful and healthy experience that these popsicles bring. You’ll not only enjoy the satisfaction of creating a delicious frozen treat but also relish in the refreshing taste of your very own Tropical Kiwi Bliss Popsicles.
