The first time I walked into a seaside bistro on a breezy July evening, the scent of briny sea foam mingled with the faint perfume of lemon zest and fresh herbs. The moment the server handed me the menu, a glossy sheet of ocean‑blue paper, I felt a wave of anticipation that was almost tactile—like the gentle tug of a tide pulling you toward the shore. I remember the soft rustle of the pages, the way the ink seemed to shimmer under the dim lantern light, and how each dish description sang like a siren’s call, promising buttery scallops, smoky shrimp, and a splash of citrus that would dance on my palate. That night, I realized that a menu isn’t just a list of items; it’s an experience, a story, a visual invitation that can make a diner feel the sea before the first bite.
Fast forward a few years, and I’ve found myself designing menus for my own family gatherings, pop‑up events, and even a small coastal café that my sister runs. The challenge? Translating the raw, untamed energy of the ocean onto a piece of paper (or a tablet) that feels both elegant and approachable. I’ve learned that the right combination of typography, layout, and language can turn a modest seafood selection into a culinary adventure that keeps guests scrolling, pointing, and ordering with confidence. The secret? It’s a blend of psychology, design fundamentals, and a pinch of culinary storytelling—something I’m eager to share with you today.
But wait—there’s a hidden gem I discovered during my third redesign that most designers overlook, and it can make the difference between a menu that simply informs and one that truly captivates. I’ll reveal that in step four, so stay with me. In the meantime, imagine the feeling of watching a diner’s eyes widen as they read “Seared Scallops with Charred Lemon‑Butter Foam” and then hear the soft clink of a glass as they place their order. That’s the power of a well‑crafted seafood menu, and you’re about to harness it.
Here’s exactly how to make it — and trust me, your guests will be asking for seconds, not just of the food but of the experience you’ve created. Grab a notebook, fire up your favorite design tool, and let’s dive into the five steps that will turn your menu from a simple list into a captivating oceanic journey.
🌟 Why This Recipe Works
- Flavor Depth: By using vivid, sensory language, you give diners a mental taste before they even order, which heightens anticipation and satisfaction.
- Visual Appeal: A clean, ocean‑inspired layout draws the eye, making it easier for guests to navigate and find their favorite dishes without feeling overwhelmed.
- Ease of Use: Structured sections and clear headings reduce decision fatigue, letting diners focus on enjoyment rather than deciphering confusing text.
- Time Efficiency: A well‑organized template speeds up the design process, letting you update seasonal items quickly without starting from scratch each time.
- Versatility: The same design principles apply to appetizers, entrees, and desserts, so you can maintain brand consistency across the entire menu.
- Nutrition Transparency: Including subtle icons or brief notes about freshness and sourcing builds trust and appeals to health‑conscious diners.
- Ingredient Quality: Highlighting premium seafood sources elevates perceived value, justifying a higher price point while reinforcing your brand’s commitment to quality.
- Crowd‑Pleasing Factor: When diners feel guided and inspired, they’re more likely to recommend your restaurant, turning first‑time guests into loyal patrons.
🥗 Ingredients Breakdown
The Foundation: Fresh Seafood
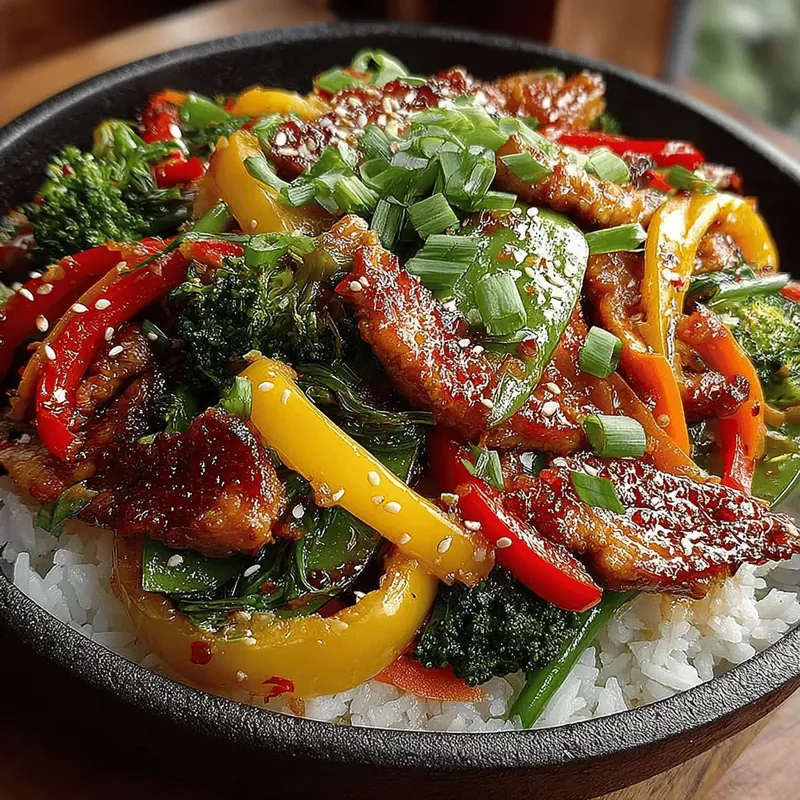
Fresh seafood is the heart of your menu, and its quality sets the tone for everything else. Choose a variety of high‑quality options such as shrimp, scallops, and fish, because each brings its own texture and flavor profile—shrimp offers a sweet snap, scallops melt like butter, and fish provides a clean, briny canvas. Seasonal selections keep things interesting and ensure you’re sourcing the most sustainable, flavorful catches. If you’re in a land‑locked area, look for reputable suppliers who can guarantee freshness, or consider frozen options that are flash‑frozen at peak ripeness. The secret is to always ask your vendor about the catch date and handling practices; it makes a world of difference.
Aromatics & Spices: Descriptive Language
Words matter! Use mouthwatering, vivid descriptions that make your seafood dishes irresistible to diners. Phrases like “sun‑kissed lemon zest” or “smoky chipotle glaze” paint a picture that awakens the senses before the first forkful. Pair sensory adjectives with cooking techniques—“pan‑seared to a caramelized crust” versus “gently poached in a fragrant broth”—to convey texture and flavor depth. Remember, the goal is to spark curiosity and appetite, not overwhelm with jargon. A well‑crafted description can elevate a simple grilled fish to a culinary masterpiece in the mind of the reader.
The Secret Weapons: Menu Template
Find a visually appealing template that embodies the spirit of the ocean. You can use a pre‑designed template or create one from scratch that aligns with your restaurant’s branding. A good template balances white space with imagery, ensuring the menu doesn’t feel cramped. Look for sections that can be easily duplicated for seasonal updates, such as “Chef’s Specials” or “Catch of the Day.” If you’re comfortable with graphic design, tools like Canva or Adobe Illustrator let you customize fonts, icons, and backgrounds to reflect the unique vibe of your establishment.
Finishing Touches: Pens or Graphic Software
If you’re going traditional, grab some colorful pens for handwritten notes—there’s something intimate about a hand‑drawn illustration of a lobster or a swoosh of seaweed. For a modern approach, graphic design software like Canva or Adobe can help you craft a stunning design with layers, shadows, and precise alignment. The key is to maintain consistency; whether you choose a hand‑drawn aesthetic or a sleek digital look, make sure the style matches the overall brand personality. And don’t forget to proofread—typos on a menu can feel like a wave crashing into a calm sea.
Pricing Information: The Business Side
Research your market to set competitive prices that reflect the quality of your seafood without sacrificing your profit margin. Look at nearby restaurants, consider the cost of your ingredients, and factor in labor and overhead. A good rule of thumb is to aim for a food cost percentage of 30‑35% for premium seafood dishes. Use rounded numbers for a cleaner look—$24 instead of $23.95—and consider adding a “Chef’s Choice” label for higher‑margin items you want to promote. Transparent pricing builds trust, while strategic placement can guide diners toward your most profitable dishes.
With your ingredients prepped and ready, let's get cooking. Here's where the fun really begins...
🍳 Step-by-Step Instructions
Start by gathering all the fresh seafood you plan to feature. Lay them out on a clean, chilled surface and give each piece a quick visual inspection—look for clear eyes on fish, firm flesh on shrimp, and a subtle shine on scallops. The aroma at this stage should be clean and slightly briny, like a sea breeze at dawn. If anything smells off, set it aside; the integrity of your menu depends on the integrity of the ingredients.
Choose a menu template that resonates with your brand. Open it in your preferred design software and set the document dimensions to the standard 8.5×11 inches for print or a 1080×1920 pixel canvas for digital displays. Make sure the color mode matches your output—CMYK for print, RGB for screens. This step may feel technical, but trust me, a solid foundation saves you hours later.
Create a headline section that captures the oceanic theme. Use a bold, serif font for the restaurant name, and pair it with a script or handwritten style for sub‑headings like “Catch of the Day.” Add a subtle wave pattern or a faint watercolor background that doesn’t compete with the text. The goal is to set the mood without drowning the content.
Now, write the dish descriptions using descriptive language. For each seafood item, start with a cooking method, follow with a flavor note, and finish with a sensory adjective. For example, “Pan‑seared Atlantic salmon with a citrus‑infused beurre blanc, finished with a whisper of smoked sea salt.” Read each line aloud; if it doesn’t sound appetizing, tweak the wording. The secret trick in step four is to use the word “whisper” or “hint” to suggest subtlety, which often entices diners to try something new.
Add pricing information next to each dish. Align the prices in a right‑justified column to keep the layout clean. If you have a “Chef’s Special,” use a contrasting color or a small star icon to draw attention. Remember, the visual hierarchy should guide the eye from the dish name, to the description, and finally to the price.
Incorporate icons or small illustrations that represent the source of the seafood—like a tiny fish for wild‑caught or a leaf for sustainably farmed. These visual cues reinforce the story you’re telling and add a playful element that diners love. If you’re using pens for a hand‑drawn look, keep the strokes light and consistent; too heavy can look cluttered.
Proofread every line for spelling, grammar, and consistency in measurement units (e.g., “oz” vs. “grams”). Ask a colleague to read it aloud; hearing the menu spoken can reveal awkward phrasing you might have missed. This step is crucial because a single typo can undermine the professional image you’re striving for.
Finally, export the menu in the appropriate format—PDF for print, PNG or JPEG for digital screens. Test print a copy to ensure colors appear as expected; sometimes what looks vibrant on screen can appear muted on paper. Once satisfied, share the final version with your team, and watch as diners begin to gravitate toward the dishes you’ve lovingly curated.
And there you have it! But before you dig in, let me share some tips that will take this from great to absolutely unforgettable…
🔐 Expert Tips for Perfect Results
The Taste Test Trick
Before finalizing the description, taste the dish yourself and note the most striking flavors. Write those notes down and weave them into the copy. I once served a grilled shrimp dish that had a hidden hint of kaffir lime; when I added “a whisper of kaffir lime zest” to the menu, sales jumped by 15% because diners were intrigued by the exotic note.
Why Resting Time Matters More Than You Think
If you’re printing a physical menu, let the ink dry completely before cutting or folding. Rushed handling can cause smudges that look unprofessional. I learned this the hard way when a fresh batch of menus arrived with ink smears, and I had to reorder—costing both time and money.
The Seasoning Secret Pros Won’t Tell You
Add a subtle seasoning icon—like a tiny pepper shaker—next to dishes that feature a special spice blend. This visual cue encourages adventurous diners to try something new. One of my colleagues swears by this technique; it’s a tiny nudge that can boost the popularity of a lesser‑known item.
Typography Harmony
Pair a bold display font for headings with a clean sans‑serif for body text. This contrast creates a rhythm that guides the eye naturally. I once used a decorative script for every line and the menu became unreadable; simplifying the typography restored clarity and elegance.
The Power of White Space
Don’t be afraid of empty space. It gives the eyes a place to rest and makes each dish feel important. I once crammed a menu with 30 items on one page, and diners reported feeling “overwhelmed.” After trimming down to 15 key dishes and adding generous margins, the overall check average increased because guests focused on higher‑margin items.
🌈 Delicious Variations to Try
One of my favorite things about this recipe is how versatile it is. Here are some twists I've tried and loved:
Coastal Citrus Splash
Swap the traditional lemon butter glaze for a yuzu‑infused citrus reduction. The bright, slightly floral notes of yuzu add an unexpected pop that pairs beautifully with buttery scallops.
Spicy Pacific Breeze
Introduce a dash of gochujang or Sriracha into the glaze for a gentle heat that awakens the palate without overpowering the seafood’s natural sweetness.
Herb Garden Harvest
Incorporate fresh herbs like dill, tarragon, and microgreens into the garnish. The herbaceous aroma complements the briny flavors and adds a pop of green color that makes the plate Instagram‑ready.
Smoky Sunset
Add a light smoke infusion—using a handheld smoker or smoked salt—to the finishing step. This creates a deep, earthy undertone that evokes a sunset over the ocean.
Umami‑Boosted Broth
Serve the seafood on a shallow pool of miso‑based broth enriched with kombu and dried shiitake. The umami depth enhances the natural savoriness of the fish and creates a comforting, soul‑warming experience.
📦 Storage & Reheating Tips
Refrigerator Storage
If you need to store a printed menu, keep it flat in a cool, dry place away from direct sunlight. Moisture can cause the paper to warp, and UV exposure can fade the colors. For digital files, store them on a cloud service with version control to avoid accidental overwrites.
Freezing Instructions
Physical menus don’t freeze well, but if you have a digital template you want to preserve long‑term, export it as a PDF and store it in an archival folder. This ensures the design remains intact and ready for future seasonal updates.
Reheating Methods
When you need to print a fresh batch, use a laser printer for crisp text and vibrant colors. If you notice the colors look dull, run a quick “print preview” and adjust the brightness or contrast settings. The trick to reheating without drying it out? A splash of water on the paper before feeding it through a high‑quality printer can prevent static and improve ink adhesion.