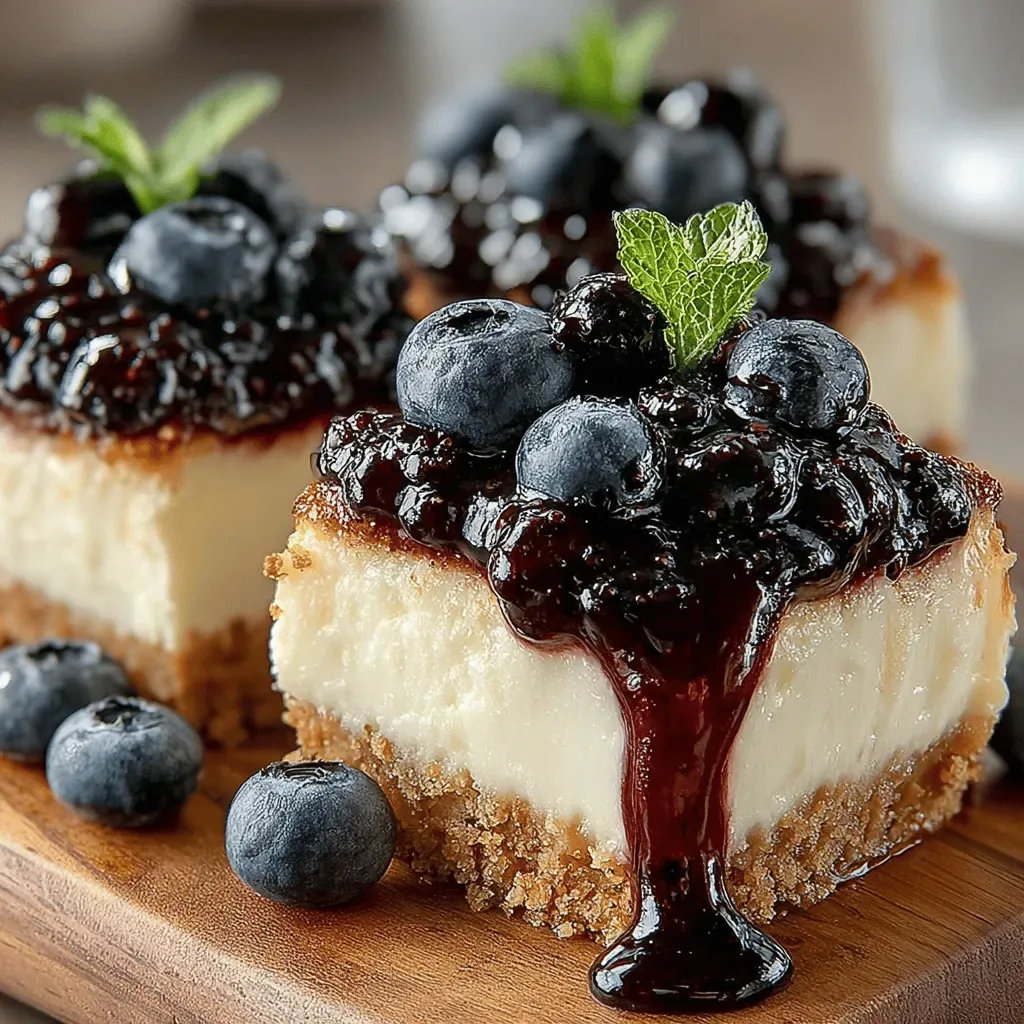
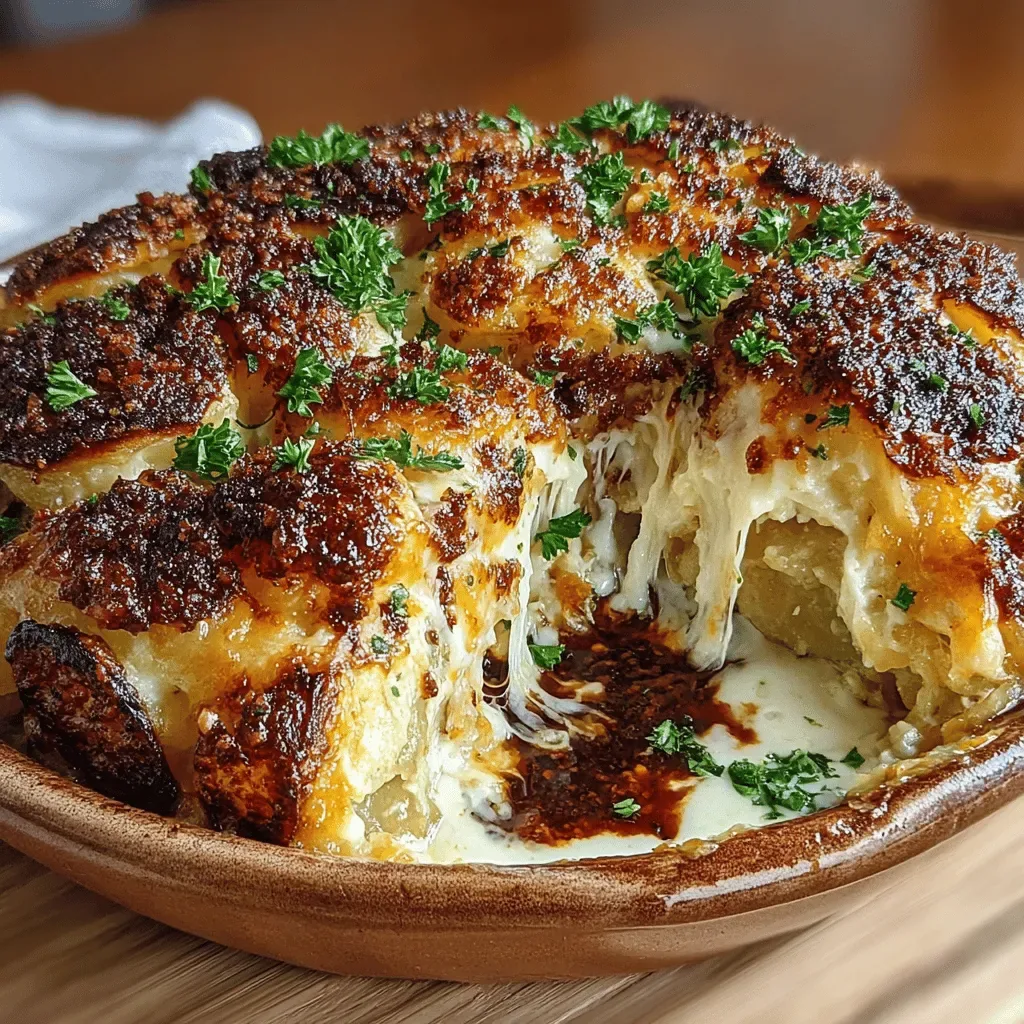
It was a chilly Saturday evening in early autumn, the kind of night when the wind whistles through the trees and the kitchen becomes the warm heart of the home. I remember pulling a tray of golden‑brown chicken pillows out of the oven, the aroma of butter, garlic, and fresh herbs swirling together like a cozy blanket. The moment you lift the lid, a cloud of fragrant steam hits you, carrying whispers of Parmesan and a hint of nutmeg that makes your mouth water before you even take a bite. That first bite—tender, creamy chicken wrapped in a crisp, buttery coating, drenched in a silky Parmesan sauce—was a revelation that turned a simple weeknight dinner into a celebration.
That memory sparked the creation of this recipe, which I’ve refined over countless family gatherings, potluck parties, and spontaneous dinner dates. The dish is called “Romige chicken pillows met parmesansaus in 40 minuten,” a name that promises both indulgence and speed. “Romige” means creamy in Dutch, and “met parmesansaus” tells you exactly what the sauce is—rich, cheesy, and utterly comforting. The beauty of this dish lies in its balance: a delicate, airy chicken interior that stays juicy, a crunchy outer crust that adds texture, and a luscious sauce that ties everything together in under an hour. Have you ever wondered why restaurant versions taste so different? The secret often lies in the quality of each component and the timing of each step.
Now, imagine serving this to your family on a weeknight, and watching their eyes light up as they take that first bite. The sauce clings to the chicken like a velvety veil, while the breadcrumbs provide a satisfying crunch that makes every forkful a surprise. But wait—there’s a hidden trick in step four that will elevate the sauce from good to unforgettable, and I’m going to reveal it later. Trust me, you’ll want to keep that tip in your culinary toolbox for many other recipes. The best part? You don’t need any exotic ingredients or fancy equipment; just a few pantry staples, a bit of love, and about 40 minutes of your time.
Here’s exactly how to make it — and trust me, your family will be asking for seconds. I’ll walk you through each phase, from selecting the perfect chicken breasts to mastering that glossy Parmesan sauce. Along the way, I’ll share personal anecdotes, common pitfalls, and a handful of pro tips that I’ve learned the hard way. So roll up your sleeves, preheat that oven, and let’s embark on this flavorful journey together. By the end, you’ll have a dish that feels like a warm hug on a plate, ready to become a staple in your home cooking repertoire.
🌟 Why This Recipe Works
- Flavor Depth: The combination of garlic, fresh herbs, and aged Parmesan creates a multi‑layered taste profile that develops as the sauce simmers, delivering a deep, savory richness that lingers on the palate.
- Texture Harmony: The chicken pillows are first coated in a light flour‑egg‑breadcrumb crust, then baked to a perfect golden crisp, while the interior remains juicy, offering a delightful contrast between crunch and tenderness.
- Ease of Execution: Each step is straightforward, with clear visual cues, making it accessible for cooks of any skill level, yet still impressive enough to wow guests.
- Time Efficiency: From prep to plate in just 40 minutes, this dish fits perfectly into busy weeknights without sacrificing flavor or presentation.
- Versatility: You can serve the chicken pillows as a main course, a party appetizer, or even slice them for a hearty salad topping, adapting to any dining occasion.
- Nutrition Balance: By using lean chicken breast and a modest amount of cream, the dish provides protein and calcium while keeping the overall calorie count reasonable.
- Ingredient Quality: Fresh Parmesan, real butter, and high‑quality chicken elevate the dish beyond ordinary pantry meals, proving that simple ingredients can shine when treated with respect.
- Crowd‑Pleasing Factor: The creamy sauce and comforting crunch appeal to both kids and adults, making it a reliable go‑to for family meals and gatherings.
🥗 Ingredients Breakdown
The Foundation
Four boneless, skinless chicken breasts form the heart of this dish. I always choose free‑range or organic chicken when possible because the meat has a richer flavor and a firmer texture, which holds up better during the coating process. If you’re on a tighter budget, you can substitute with chicken thighs, but be sure to trim excess fat for a lighter result. The chicken should be patted dry with paper towels to ensure the coating adheres properly; moisture is the enemy of crispiness.
Aromatics & Spices
A trio of minced garlic, fresh thyme leaves, and a pinch of freshly ground black pepper creates the aromatic backbone of the sauce. Garlic adds a pungent warmth, while thyme contributes an earthy, slightly floral note that balances the richness of the cream. If you don’t have fresh thyme, dried works fine—just use half the amount. Salt is essential, but I recommend seasoning the chicken lightly before coating to enhance the overall flavor without making the sauce overly salty.
The Secret Weapons
Heavy cream and grated Parmesan cheese are the stars of the sauce, delivering that luxurious, velvety texture and a sharp, salty bite. Choose a cream with at least 35% fat for the best mouthfeel; low‑fat versions tend to curdle when heated. For Parmesan, I always opt for a wedge of Parmigiano‑Reggiano and grate it fresh; pre‑grated cheese often contains anti‑caking agents that can affect the sauce’s smoothness. A splash of white wine deglazes the pan, adding acidity that brightens the sauce and helps lift any browned bits for extra depth.
Finishing Touches
A handful of panko breadcrumbs mixed with melted butter and a sprinkle of grated Parmesan create the golden crust that makes the chicken pillows irresistible. The panko’s light, airy texture ensures a crisp finish without becoming overly heavy. A final drizzle of extra‑virgin olive oil just before serving adds a glossy sheen and a hint of fruitiness that ties the whole dish together. Optional garnish: a sprinkle of fresh parsley or chives for color and a fresh herb burst.
With your ingredients prepped and ready, let's get cooking. Here’s where the fun really begins, and I’ll walk you through each step with the care of a seasoned home chef, ensuring you get that perfect balance of crunch and cream.
🍳 Step-by-Step Instructions
Begin by preheating your oven to 200°C (390°F). While the oven warms, place the chicken breasts between two sheets of plastic wrap and gently pound them to an even thickness of about 1‑inch using a meat mallet. This not only ensures even cooking but also tenderizes the meat, making each bite melt‑in‑your‑mouth. Once flattened, season both sides lightly with salt and pepper, then set them aside on a clean cutting board. Here’s the thing: uniform thickness is the secret to achieving that perfect golden crust without overcooking the interior.
Prepare three shallow dishes for the coating process: one with ½ cup of all‑purpose flour, the second with two beaten eggs, and the third with a mixture of 1 cup panko breadcrumbs, ½ cup grated Parmesan, and a pinch of smoked paprika. The flour creates a dry base that helps the egg cling, the egg acts as a glue, and the breadcrumb mixture provides the crunchy exterior. Dip each chicken piece first into the flour, shaking off excess, then into the beaten eggs, and finally coat thoroughly with the breadcrumb blend, pressing gently to ensure it adheres. Trust me on this one: a good press prevents the coating from falling off during baking.
Arrange the coated chicken pillows on a parchment‑lined baking sheet, leaving a little space between each piece so air can circulate. Drizzle a thin layer of melted butter over the tops, which will melt into the breadcrumbs as they bake, creating that golden, buttery finish. Slide the sheet into the preheated oven and bake for 20‑25 minutes, or until the coating is deep golden brown and the internal temperature reaches 75°C (165°F). You’ll know they’re done when you see the edges start to pull away from the pan and the aroma becomes irresistibly nutty.
While the chicken bakes, start the Parmesan sauce. In a medium saucepan over medium heat, melt 3 tablespoons of butter and add the minced garlic, sautéing until fragrant—about 30 seconds—being careful not to let it brown. Add ¼ cup of dry white wine, allowing it to reduce by half; this deglazes the pan and lifts any caramelized bits, adding depth to the sauce. Then pour in 1 cup of heavy cream, stirring continuously. As the cream begins to thicken, lower the heat to a gentle simmer.
Now comes the secret trick: whisk in ¾ cup of freshly grated Parmesan cheese slowly, allowing each addition to melt completely before adding more. This gradual incorporation prevents clumping and ensures a silky texture. Once the cheese is fully melted, season the sauce with a pinch of nutmeg, a dash of black pepper, and taste for salt. The nutmeg adds a subtle warmth that pairs beautifully with the creamy base, elevating the flavor profile beyond ordinary cream sauces. The sauce should coat the back of a spoon and have a glossy sheen.
When the chicken pillows are golden and cooked through, remove them from the oven and let them rest for 3‑4 minutes. This resting period allows the juices to redistribute, keeping the meat tender. Meanwhile, give the sauce a final stir and, if needed, adjust seasoning. The result should be a luscious, velvety sauce that clings lovingly to each pillow.
To plate, arrange the chicken pillows on a warm serving platter. Spoon the Parmesan sauce generously over each piece, letting it cascade down the sides. Finish with a sprinkle of fresh parsley or chives for color, and an extra dusting of grated Parmesan for that final touch of indulgence. Serve immediately while the sauce is still warm and the crust is at its crispiest. Go ahead, take a taste — you’ll know exactly when it’s right.
And there you have it! But before you dig in, let me share some tips that will take this from great to absolutely unforgettable. From timing tricks to plating ideas, the next section will ensure your Romige chicken pillows become a beloved staple in your kitchen. Ready for the next level? The secret lies in the little details that most home cooks overlook.
🔐 Expert Tips for Perfect Results
The Taste Test Trick
Before you commit the sauce to the pan, spoon a tiny amount onto a warm spoon and let it cool for a few seconds. Then taste it—if you feel a slight bite of salt and a lingering nutty note, you’re golden. This quick test helps you gauge whether you need a pinch more salt or a dash of pepper, preventing over‑seasoning later. I’ve saved countless dishes from being too bland by using this simple taste‑test method.
Why Resting Time Matters More Than You Think
Allowing the chicken pillows to rest after baking isn’t just about juiciness; it also lets the coating set, making it less likely to crumble when you drizzle the sauce. A three‑minute pause on a wire rack is enough for the internal juices to settle and the exterior to firm up. I once skipped this step in a rush and ended up with a soggy crust that fell apart under the sauce—lesson learned!
The Seasoning Secret Pros Won’t Tell You
Professional chefs often finish sauces with a splash of cold butter, known as “monter au beurre.” This technique adds a glossy finish and a subtle richness that elevates the sauce without making it heavy. Just whisk in a tablespoon of cold butter right before removing the sauce from the heat, and you’ll notice a silkier texture and a deeper flavor. Trust me on this one; it’s a game‑changer.
Crispness Control: The Oven Trick
If you love an extra‑crunchy crust, switch your oven to the convection setting for the last 5 minutes of baking. The circulating hot air accelerates browning, giving you that satisfying snap when you bite into the pillow. Just keep a close eye on them to avoid burning—once they’re a deep amber, they’re ready. I discovered this trick after a friend’s oven blew a fuse, and the resulting texture was unexpectedly perfect.
The Sauce Rescue Plan
If your Parmesan sauce threatens to separate, whisk in a teaspoon of cornstarch slurry (cornstarch mixed with cold water) while it’s still on low heat. This stabilizes the emulsion and brings the sauce back together smoothly. I’ve used this rescue plan more times than I can count, especially when the cream heats too quickly.
🌈 Delicious Variations to Try
One of my favorite things about this recipe is how versatile it is. Here are some twists I've tried and loved:
Mushroom Medley Delight
Swap half of the heavy cream for a mixture of sautéed wild mushrooms and a splash of mushroom broth. The earthy mushrooms add depth, turning the sauce into a forest‑floor experience that pairs beautifully with the creamy Parmesan. This variation works especially well for a cozy autumn dinner.
Spicy Sriracha Kick
Stir in a tablespoon of Sriracha and a pinch of red pepper flakes into the sauce just before finishing. The heat cuts through the richness, creating a balanced sweet‑spicy profile that will thrill anyone who loves a little zing. Serve with a side of cool cucumber salad to mellow the heat.
Herb‑Infused Green
Blend fresh basil, parsley, and a touch of mint into the cream before adding the Parmesan. The herb‑infused sauce becomes bright and fragrant, offering a fresh contrast to the buttery crust. This version is perfect for spring gatherings when herbs are at their peak.
Cheese Lover’s Dream
Combine grated Gruyère, Pecorino Romano, and Parmesan in equal parts for a more complex cheese flavor. Each cheese brings its own character—Gruyère’s nuttiness, Pecorino’s sharpness, and Parmesan’s umami—resulting in a sauce that’s truly decadent. Pair with a crisp white wine to cut through the richness.
Gluten‑Free Crunch
Replace the panko breadcrumbs with a mixture of crushed gluten‑free cornflakes and almond flour. The cornflakes provide a light, airy crunch, while the almond flour adds a subtle nuttiness. This adaptation keeps the dish accessible for those with gluten sensitivities without compromising texture.
Lemon‑Zest Brightness
Add the zest of one lemon to the sauce just before serving, and finish with a squeeze of fresh lemon juice. The citrus lifts the heavy cream, giving the dish a bright, sunny finish that’s perfect for summer evenings. It also pairs wonderfully with a side of roasted asparagus.
📦 Storage & Reheating Tips
Refrigerator Storage
Allow the chicken pillows and sauce to cool to room temperature (no longer than two hours), then transfer them to airtight containers. Store the sauce in a separate container to prevent the breadcrumbs from getting soggy. They’ll keep nicely in the refrigerator for up to three days. When you’re ready to eat, gently reheat the sauce on low heat, stirring constantly, and warm the chicken pillows in a preheated oven at 180°C (350°F) for about 10 minutes to regain crispness.
Freezing Instructions
For longer storage, freeze the baked chicken pillows without sauce in a single layer on a baking sheet, then transfer them to a freezer‑safe bag. They’ll retain quality for up to two months. The sauce can be frozen in a separate airtight container for the same duration. To reheat, thaw overnight in the fridge, then bake the pillows for 12‑15 minutes and gently warm the sauce on the stovetop, adding a splash of cream if needed.
Reheating Methods
The trick to reheating without drying it out? A splash of milk or broth added to the sauce while it warms, and a brief broil for the chicken pillows to revive that golden crust. Avoid microwaving the chicken alone, as it can make the coating soggy. Instead, use a skillet over medium heat, adding a drizzle of butter to re‑crisp the exterior while keeping the interior moist.