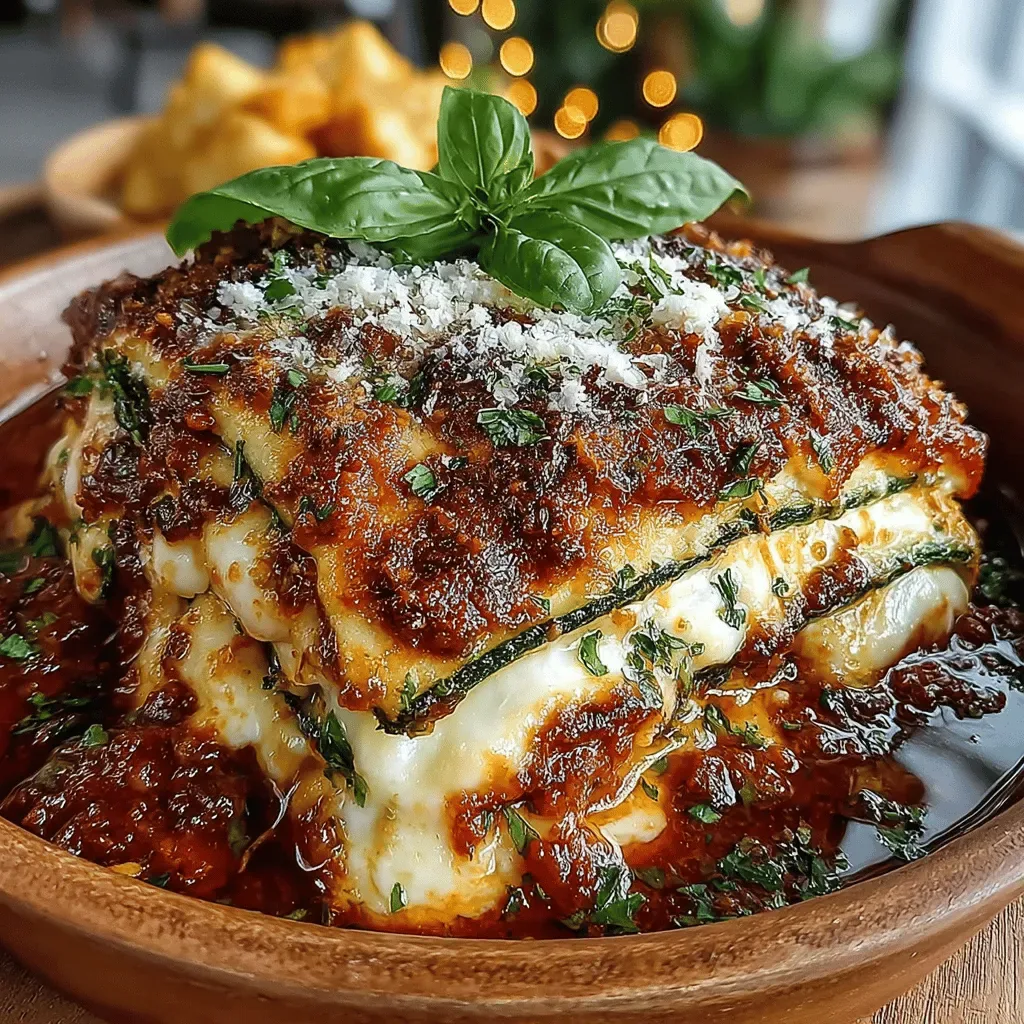
The first time I tried to host a New Year's Eve dinner, I was standing in my tiny kitchen, the clock ticking down to midnight, and the scent of rosemary and garlic was already swirling in the air. I remember the moment I lifted the lid off the roasting pan and a cloud of fragrant steam hit me like a warm hug, carrying notes of caramelized beef, earthy herbs, and a whisper of red wine. That single breath convinced me that the dish I was about to serve could become a family tradition, a centerpiece that would mark every celebration with a burst of flavor and a sense of togetherness. Have you ever wondered why some meals feel like a celebration in themselves while others just pass the time? The answer lies in the balance of texture, aroma, and the love you pour into each step.
What makes this particular recipe stand out is its simplicity paired with a luxurious feel. A perfectly seared beef tenderloin, surrounded by vibrant vegetables, bathed in a glossy red‑wine reduction, creates a symphony of flavors that feels both comforting and elegant. I’ve watched my cousins’ eyes widen as they cut into the tender meat, the juices glistening like tiny fireworks against the dark sauce. The best part? You don’t need a professional kitchen or a brigade of sous‑chefs; just a few quality ingredients and a willingness to follow five sensational steps. But wait—there’s a secret trick in step four that will elevate the sauce from good to unforgettable, and I’ll reveal it soon.
Imagine the scene: the clock strikes twelve, the fireworks outside paint the sky, and your table is set with a dish that looks like it belongs in a five‑star restaurant. Your guests will be drawn to the centerpiece, their forks poised, ready to dive in, and you’ll feel that warm glow of pride that only a well‑executed home‑cooked feast can bring. The flavors will linger long after the last bite, sparking conversations about the next gathering and how this dish became the star of the night. Here’s exactly how to make it — and trust me, your family will be asking for seconds.
🌟 Why This Recipe Works
- Flavor Depth: The combination of red wine, beef broth, and fresh herbs creates a layered sauce that deepens as it simmers, delivering a rich umami punch that coats every bite.
- Texture Harmony: A quick sear locks in juices, while the oven finish ensures the interior stays buttery‑tender, and the mixed vegetables add a satisfying bite and contrast.
- Ease of Execution: With just five major steps, the recipe is approachable for home cooks of any skill level, yet it feels sophisticated enough for special occasions.
- Time Efficiency: The prep and cook times are balanced so you can spend more time with guests and less time hovering over the stove.
- Versatility: The base can be adapted with different herbs, wines, or even a splash of balsamic for a sweeter twist, making it suitable for varied palates.
- Nutrition Balance: Lean beef provides high‑quality protein, while the vegetables supply fiber, vitamins, and minerals, creating a well‑rounded meal.
- Ingredient Quality: Using well‑marbled beef tenderloin ensures juiciness, and fresh aromatics amplify the dish’s aroma and taste.
- Crowd‑Pleasing Factor: The visual appeal of a glossy, ruby‑red sauce and colorful veggies makes the plate Instagram‑ready and conversation‑starting.
🥗 Ingredients Breakdown
The Foundation: Beef Tenderloin
The star of this dish is a 2‑lb beef tenderloin, prized for its buttery texture and subtle flavor. Look for a piece that’s well‑marbled—those thin streaks of fat melt into the meat as it cooks, keeping it moist and adding a luxurious mouthfeel. If you can’t find a whole tenderloin, a center‑cut filet works just as well, but be sure to trim any silverskin for a cleaner bite. A tip from my grandmother: she always pats the meat dry with paper towels before seasoning; this tiny step ensures a crisp, caramelized crust. The result? A centerpiece that feels both tender and robust, ready to become the talk of the table.
Aromatics & Spices
Garlic, rosemary, and thyme form the aromatic backbone of the dish. Two cloves of minced garlic release a sweet, pungent aroma that instantly awakens the senses, while the rosemary and thyme add earthy, piney notes that complement the beef’s richness. Fresh herbs are essential; they burst with flavor when they hit the hot pan, unlike dried versions which can taste muted. If you’re out of fresh rosemary, a teaspoon of dried will suffice, but add it earlier in the cooking process to rehydrate. Salt and freshly cracked black pepper are the final seasoning layers that bring everything together, enhancing the natural flavors without overpowering them.
The Secret Weapons: Wine & Broth
A cup of dry red wine and a cup of low‑sodium beef broth form the sauce’s liquid foundation. The wine not only deglazes the pan, lifting the caramelized bits (fond) but also contributes acidity that balances the richness of the meat. As the wine reduces, its flavors concentrate, creating a glossy, velvety sauce that clings to the tenderloin. The broth adds depth and body, preventing the sauce from becoming too sharp. If you prefer a non‑alcoholic version, replace the wine with pomegranate juice or a splash of balsamic vinegar for a sweet‑tart twist.
Finishing Touches: Mixed Vegetables
A colorful medley of carrots, green beans, and potatoes brings both visual appeal and textural contrast. The carrots add a subtle sweetness, the green beans provide a crisp snap, and the potatoes offer a comforting, starchy bite that soaks up the sauce. Choose fresh, firm vegetables; for potatoes, Yukon Golds hold their shape beautifully while delivering a buttery flavor. You can swap in parsnips, Brussels sprouts, or even sweet potatoes for seasonal variations. The key is to cut everything into uniform pieces so they cook evenly alongside the beef.
With your ingredients prepped and ready, let's get cooking. Here's where the fun really begins, and I promise you’ll discover a few insider tricks that turn a good dinner into a legendary one.
🍳 Step-by-Step Instructions
Preheat your oven to 400°F (200°C). While the oven warms, pat the beef tenderloin dry with paper towels, then rub it all over with the olive oil. This thin coating helps the seasonings adhere and promotes a beautiful sear later on. Sprinkle the salt, black pepper, chopped rosemary, and thyme evenly, pressing gently so the herbs stick. The aroma of fresh herbs will already start to fill your kitchen, hinting at the flavor explosion to come.
Heat a heavy‑bottomed skillet—cast iron works wonders—over medium‑high heat until it’s almost smoking. Add the tenderloin and let it sizzle without moving for about 3‑4 minutes, until a deep golden crust forms. Flip the meat and repeat on the other side, listening for that satisfying crackle that signals a perfect sear. Once both sides are browned, remove the beef and set it aside on a plate; the pan will be packed with flavorful browned bits (fond) that are pure gold for the sauce.
Add the minced garlic to the hot pan, stirring quickly to avoid burning—garlic burns in seconds, turning bitter. As soon as it turns fragrant (about 30 seconds), pour in the cup of red wine, scraping the bottom with a wooden spoon to dissolve every caramelized fragment. Let the wine simmer and reduce by half, which should take about 5‑7 minutes; you’ll notice the aroma intensify and the liquid thicken slightly.
Stir in the beef broth, return the seared tenderloin to the skillet, and nestle the mixed vegetables around it. The broth will combine with the reduced wine, forming a glossy sauce that starts to bubble gently. Transfer the entire skillet to the preheated oven and roast for 15‑20 minutes, or until the internal temperature of the beef reaches 130°F for medium‑rare (or your desired doneness). The vegetables will become tender yet retain a slight bite, and the sauce will thicken further, coating everything in a luxurious sheen.
Remove the skillet from the oven and transfer the beef to a cutting board; let it rest for at least 10 minutes. Resting allows the juices to redistribute, ensuring every slice is juicy rather than dry. While the meat rests, place the skillet back on the stove over medium heat and let the sauce reduce a bit more if it looks too thin—this concentrates the flavors.
Slice the tenderloin against the grain into thick, elegant medallions. Arrange the slices on a serving platter, surrounding them with the roasted vegetables. Drizzle the reduced sauce generously over the meat and veg, allowing the glossy glaze to pool invitingly on the plate.
Finish with a final sprinkle of fresh rosemary or thyme for a pop of color and an aromatic lift. Serve immediately while the sauce is still warm and the beef is at its peak tenderness. Pair with a glass of the same red wine you used in the sauce for a harmonious dining experience.
And there you have it! But before you dig in, let me share some tips that will take this from great to absolutely unforgettable. Trust me, these little adjustments can turn your NYE dinner into a culinary masterpiece that guests will rave about for years.
🔐 Expert Tips for Perfect Results
The Taste Test Trick
Before the final roast, dip a tiny spoonful of the sauce into a piece of crusty bread. If the flavor feels balanced—savory, slightly acidic, and just a hint of sweetness—you’re on the right track. Adjust with a pinch more salt or a splash of wine if needed. This quick test saves you from a bland finish and ensures every bite sings.
Why Resting Time Matters More Than You Think
Resting isn’t just a pause; it’s a crucial step that lets the muscle fibers relax and re‑absorb the juices. I once sliced into a hot tenderloin right away and watched the juices run like a mini waterfall, leaving the meat dry. Letting it rest for ten minutes makes the difference between a juicy slice and a dry one, and the sauce will also thicken slightly as the meat releases residual heat.
The Seasoning Secret Pros Won’t Tell You
Professional chefs often add a pinch of flaky sea salt right before serving. This tiny burst of texture adds a delightful crunch and amplifies the flavors just before the first bite. It’s a subtle touch that makes the dish feel restaurant‑grade without any extra effort.
Control the Oven’s Humidity
Place a shallow pan of water on the lower rack while the beef roasts. The steam helps keep the interior of the meat moist, especially if you’re aiming for medium‑well. I discovered this trick during a holiday dinner where the oven was a bit dry, and the result was a perfectly juicy roast every time.
The Final Garnish Glow
A drizzle of high‑quality extra‑virgin olive oil right before serving adds a glossy sheen and a fresh, peppery finish. It also helps the sauce cling to the vegetables, ensuring every forkful is coated. I love finishing with a few micro‑greens for a pop of color and a mild peppery bite.
🌈 Delicious Variations to Try
One of my favorite things about this recipe is how versatile it is. Here are some twists I've tried and loved:
Mediterranean Magic
Swap rosemary for oregano and add a handful of Kalamata olives and sun‑dried tomatoes to the vegetable mix. The salty olives and sweet tomatoes introduce a bright, tangy dimension that pairs beautifully with the beef.
Spicy Southwest
Incorporate a teaspoon of smoked paprika and a pinch of cayenne into the seasoning blend, then toss the vegetables with corn kernels and black beans. The smoky heat and corn’s sweetness create a festive, bold flavor profile.
Herb‑Infused Butter Finish
Finish the sauce with a knob of herb‑butter (mix softened butter with chopped parsley, chives, and a dash of lemon zest). This adds a velvety richness and a citrusy lift that brightens the entire dish.
Asian‑Inspired Glaze
Replace the red wine with a mixture of soy sauce, mirin, and a splash of rice vinegar. Add grated ginger and a drizzle of sesame oil for an umami‑packed, slightly sweet glaze that transports the dish to the East.
Rustic Root Veggie Roast
Swap the mixed vegetables for a medley of parsnips, turnips, and sweet potatoes. The earthy sweetness of these root veggies caramelizes beautifully, complementing the beef’s savory depth.
Wine‑Free Wonder
If you prefer to avoid alcohol, use a combination of beef broth, a splash of balsamic vinegar, and a teaspoon of tomato paste. This creates a rich, tangy sauce that mimics the complexity of wine without the alcohol.
📦 Storage & Reheating Tips
Refrigerator Storage
Allow the leftovers to cool to room temperature (no more than two hours), then transfer the beef slices, vegetables, and sauce into airtight containers. Store in the fridge for up to three days. When reheating, keep the sauce separate and gently warm it on the stove to prevent it from becoming greasy.
Freezing Instructions
For longer preservation, wrap the cooled beef tightly in plastic wrap, then place it in a freezer‑safe bag with the sauce poured over it. The vegetables can be frozen separately to maintain texture. This method keeps the dish fresh for up to two months. Thaw overnight in the refrigerator before reheating.
Reheating Methods
The trick to reheating without drying out? A splash of beef broth or a drizzle of olive oil in a covered skillet over low heat. Heat gently, turning the slices occasionally until warmed through. For the vegetables, a quick toss in the oven at 350°F for 10 minutes restores their crispness while keeping the sauce velvety.