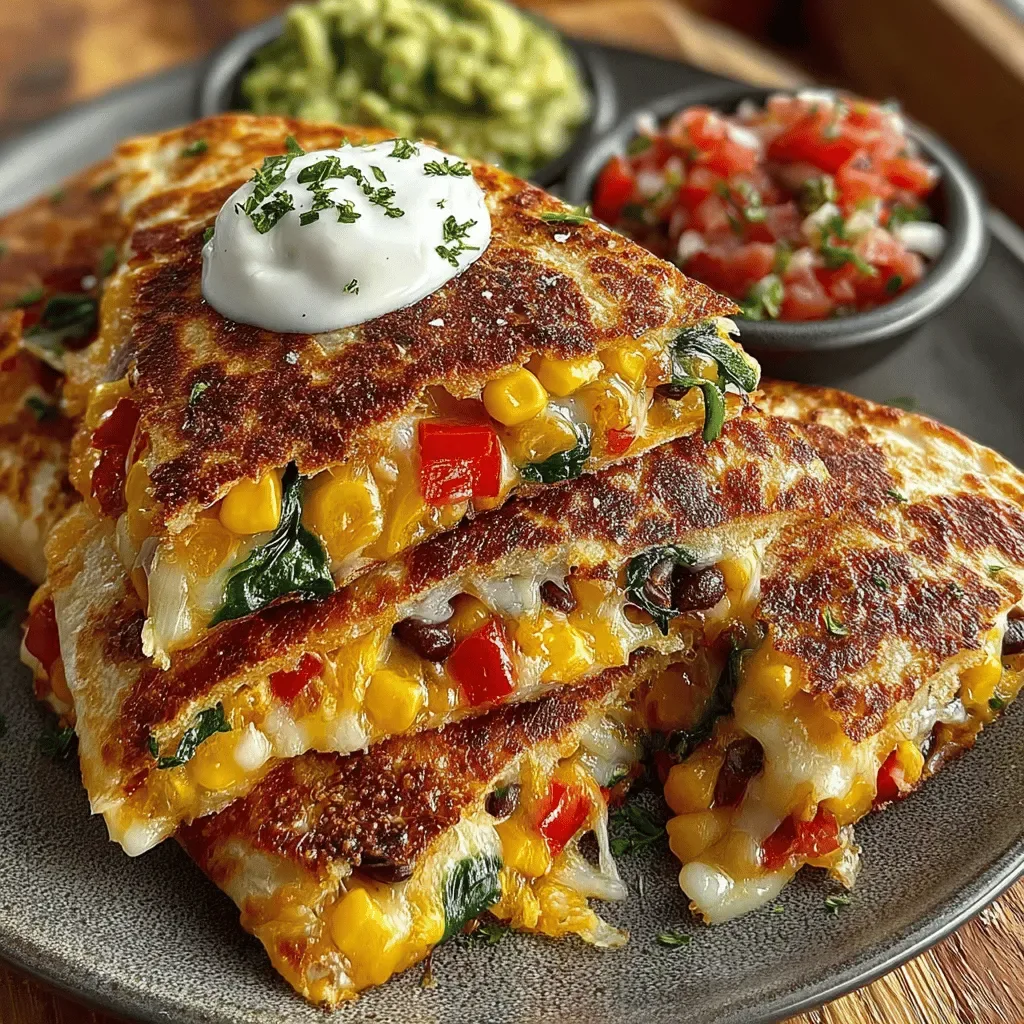
What makes these breadsticks truly special is the marriage of two comfort‑food legends – the hearty, seasoned ground beef we all love in tacos and the gooey, stretchy cheese that turns any bite into a melt‑in‑your‑mouth experience. Imagine the familiar crunch of a fresh‑baked roll, followed immediately by a burst of seasoned beef, a drizzle of salsa, and a dollop of creamy guacamole. The contrast of textures – the crisp exterior, the soft interior, the juicy meat, and the silky cheese – creates a symphony that keeps you reaching for more. But wait, there’s a secret twist in step four that will elevate the flavor profile beyond anything you’ve tried before.
If you’ve ever wondered why restaurant‑style taco breads taste so different from the frozen versions you pick up at the grocery store, the answer lies in the attention to detail, the quality of each ingredient, and a few pro tips that most chefs keep close to their chest. I’ve spent countless evenings perfecting this recipe, adjusting the seasoning, testing the dough’s elasticity, and even experimenting with different cheese blends until the flavor hit that perfect, nostalgic note. The result? A dish that’s both easy enough for a weekday dinner and impressive enough for a weekend gathering with friends.
Here’s exactly how to make it — and trust me, your family will be asking for seconds, thirds, and maybe even a whole extra batch. Grab your apron, preheat that oven, and let’s dive into the delicious world of Cheesy Taco Breadsticks. The journey from raw ingredients to a steaming plate of cheesy goodness is about to begin, and the best part? You’ll discover a few hidden gems along the way that will make this recipe a permanent fixture in your kitchen.
🌟 Why This Recipe Works
- Flavor Depth: The combination of taco‑seasoned ground beef and a Mexican cheese blend creates layers of savory, spicy, and creamy notes that dance on the palate. Each bite delivers a burst of umami followed by a mellow, buttery finish.
- Texture Harmony: The crispy, golden crust of the pizza dough contrasts beautifully with the soft, pillowy interior, while the melted cheese adds a stretchy, indulgent mouthfeel that keeps you hooked.
- Ease of Execution: All the components can be prepared on a single countertop, and the dough requires only a brief roll‑out, making it perfect for busy weeknights without sacrificing flavor.
- Time Efficiency: From prep to plate, the entire process takes under an hour, allowing you to serve a crowd‑pleasing appetizer without spending the whole day in the kitchen.
- Versatility: These breadsticks can double as a snack, a party appetizer, or even a main dish when paired with a simple salad, giving you flexibility for any occasion.
- Nutrition Balance: While indulgent, the recipe still offers protein from the beef and calcium from the cheese, making it a satisfying option that isn’t just empty calories.
- Ingredient Quality: Using fresh, high‑quality ground beef and a premium cheese blend ensures every bite bursts with authentic flavor, rather than relying on processed shortcuts.
- Crowd‑Pleasing Factor: The familiar taco flavors combined with a comforting bread base make this dish a hit with kids, adults, and even the pickiest eaters at the table.
🥗 Ingredients Breakdown
The Foundation
The base of our breadsticks is a 1‑lb pizza dough rolled out into a rectangle. This dough provides the perfect canvas – it’s sturdy enough to hold the juicy filling, yet tender enough to yield a light, airy crumb. If you’re feeling adventurous, you can swap it for a homemade focaccia or even a pre‑made puff pastry for a flakier texture, but the classic pizza dough gives you that familiar, comforting chew. When selecting dough, look for a package that mentions “high‑protein” or “bread flour” for the best rise and structure.
Aromatics & Spices
A small onion, diced, and a tablespoon of minced garlic form the aromatic backbone of the filling. The onion adds a subtle sweetness that balances the heat of the taco seasoning, while the garlic brings a pungent, earthy note that deepens the overall flavor. If you’re out of fresh garlic, a teaspoon of garlic powder works, but nothing beats the fresh, bright kick of minced cloves. Remember to sauté these aromatics gently; you want them translucent and fragrant, not browned, to preserve their delicate flavors.
The Secret Weapons
The star of the show is the 1 lb of ground beef seasoned with two tablespoons of taco seasoning. This blend typically includes cumin, paprika, chili powder, and a hint of oregano, delivering that classic Mexican zing. For a richer taste, consider using a mix of 80% lean and 20% fat beef; the extra fat renders into the meat, keeping it juicy and flavorful. If you’re looking for a leaner version, substitute turkey or chicken, but add a splash of olive oil to prevent dryness.
Finishing Touches
A cup of Mexican cheese blend (often a mix of cheddar, Monterey Jack, and a hint of queso quesadilla) melts into a luscious, golden layer that binds everything together. A tablespoon of olive oil brushed over the dough before baking encourages a crisp, caramelized crust. Finally, serve with salsa and guacamole for dipping – the acidity of the salsa cuts through the richness, while the creamy guacamole adds a cool contrast that rounds out the bite.
With your ingredients prepped and ready, let's get cooking. Here's where the fun really begins…
🍳 Step-by-Step Instructions
Preheat your oven to 425°F (220°C) and line a large baking sheet with parchment paper. While the oven warms, place the pizza dough on a lightly floured surface and roll it into a rectangular sheet about ¼‑inch thick. The dough should be large enough to fold over the filling later, roughly 12×9 inches. Feel the dough under your fingertips – it should be smooth, elastic, and just a touch tacky, indicating it’s ready for the next step.
Heat a tablespoon of olive oil in a large skillet over medium heat. Add the diced onion and sauté for about 3 minutes, until it becomes translucent and releases a sweet aroma. Then stir in the minced garlic and cook for another 30 seconds, watching for that unmistakable sizzle that signals the garlic is releasing its flavor without burning. This is the thing: you want the aromatics to perfume the oil, creating a fragrant base for the beef.
Add the ground beef to the skillet, breaking it up with a wooden spoon. Cook until the meat loses its pink color, about 5‑7 minutes, and then sprinkle the two tablespoons of taco seasoning over it. Stir well to coat the meat evenly; you’ll notice the spices turning a deeper, richer hue as they meld with the juices. Let the mixture simmer for another 2 minutes, allowing the flavors to marry. Trust me on this one: a well‑seasoned meat filling is the heart of these breadsticks.
Once the meat is fully cooked, spread it evenly over the rolled‑out dough, leaving a ½‑inch border around the edges. Sprinkle the cup of Mexican cheese blend over the meat, ensuring an even layer that will melt into a gooey blanket. Here’s where the magic happens: the cheese not only adds flavor but also acts as a glue, holding the dough together when you fold it. If you’re feeling daring, add a pinch of extra cheese on top for that extra stretch factor.
Carefully fold the dough over the filling, creating a sealed rectangle. Press the edges gently with your fingertips or a fork to seal any gaps – this prevents the filling from leaking during baking. Then, using a sharp knife or pizza cutter, slice the sealed rectangle into 12‑14 equal sticks, each about 1‑inch wide. The result should look like a row of golden‑brown logs, each with a visible seam where the dough was sealed.
Brush the tops of the breadsticks with a tablespoon of olive oil, using a pastry brush to coat them evenly. This step creates a glossy, caramelized crust that’s both visually appealing and deliciously crisp. Place the tray in the preheated oven and bake for 12‑15 minutes, or until the edges turn a deep golden brown and the cheese bubbles and lightly browns. Keep an eye on them – the moment you see the cheese start to form tiny brown spots, you know they’re ready.
Remove the breadsticks from the oven and let them rest on the baking sheet for 3‑4 minutes. This short pause allows the cheese to set slightly, making the sticks easier to handle. Transfer them to a serving platter, arrange them in a fan shape, and surround them with small bowls of salsa and guacamole for dipping. The contrast of the hot, melty sticks with the cool, creamy guacamole is simply irresistible.
Serve immediately while the breadsticks are still warm and the cheese is stretchy. Go ahead, take a taste — you’ll know exactly when it’s right. Pair them with a crisp margarita or a cold glass of iced tea, and watch as your guests disappear into the plate, reaching for more. And there you have it! But before you dig in, let me share some tips that will take this from great to absolutely unforgettable…
🔐 Expert Tips for Perfect Results
The Taste Test Trick
Before you fold the dough, take a tiny spoonful of the seasoned meat and taste it. Adjust the seasoning with a pinch more salt or a dash of chili powder if needed. This simple step ensures the filling is perfectly balanced, because a slight under‑seasoning can get lost under the cheese. I once served a batch that was a bit bland, and the feedback was immediate – a lesson learned that I never skip this quick taste test again.
Why Resting Time Matters More Than You Think
After rolling out the dough, let it rest for 10 minutes covered with a clean kitchen towel. This relaxes the gluten, making the dough easier to fold without springing back. The result is a smoother seal and a more uniform thickness throughout the breadsticks. Trust me, the extra patience pays off in a texture that’s both tender and sturdy.
The Seasoning Secret Pros Won’t Tell You
Add a splash of lime juice to the taco seasoning right before mixing it into the meat. The acidity brightens the spices and adds a subtle zing that elevates the whole dish. I discovered this trick while watching a cooking show and have been using it ever since – it’s the difference between good and unforgettable.
Cheese Melt Mastery
For an ultra‑gooey melt, grate the cheese yourself instead of using pre‑shredded varieties that often contain anti‑caking agents. Freshly grated cheese melts more uniformly and releases a richer flavor. If you’re short on time, a blend of pre‑shredded cheddar and Monterey Jack works, but the texture won’t be quite as silky.
Dough Handling Discipline
When rolling the dough, use a light dusting of flour and a rolling pin that’s slightly longer than the dough itself. This prevents sticking and ensures an even thickness. If the dough starts to dry out, lightly mist it with water and continue rolling – a quick trick that keeps the dough supple.
🌈 Delicious Variations to Try
One of my favorite things about this recipe is how versatile it is. Here are some twists I've tried and loved:
Spicy Jalapeño Kick
Finely dice two jalapeños and fold them into the ground beef mixture. The heat adds a lively punch that pairs perfectly with the cool guacamole. If you prefer a milder heat, remove the seeds before dicing.
Southwest Veggie Delight
Swap the beef for a medley of black beans, corn, and diced bell peppers. Season with the same taco blend, and you’ll have a vegetarian version that’s just as hearty. Top with a sprinkle of cotija cheese for an extra layer of flavor.
Cheddar‑Bacon Bliss
Add crisp‑cooked bacon bits to the meat filling and replace half of the Mexican cheese blend with sharp cheddar. The smoky bacon and sharp cheese create a decadent, indulgent bite that’s perfect for a weekend treat.
Herb‑Infused Elegance
Mix fresh chopped cilantro and a pinch of oregano into the beef for an herbaceous note. The fresh herbs brighten the dish and complement the earthy taco spices, making each bite feel lighter.
Sweet‑Heat Fusion
Stir in a tablespoon of honey and a dash of chipotle powder into the meat. The honey adds a subtle sweetness that balances the smoky chipotle, creating a complex flavor profile that keeps you guessing.
📦 Storage & Reheating Tips
Refrigerator Storage
Allow the breadsticks to cool completely, then store them in an airtight container or a zip‑top bag. They’ll stay fresh for up to three days in the fridge. For the best texture, place a paper towel on top before sealing to absorb any excess moisture.
Freezing Instructions
Lay the cooled breadsticks on a parchment‑lined tray and freeze them individually for about an hour. Once solid, transfer them to a freezer‑safe bag. They’ll keep for up to two months. When you’re ready to enjoy them, skip the thawing step and bake straight from frozen at 400°F for 12‑15 minutes.
Reheating Methods
To reheat, preheat your oven to 350°F and place the breadsticks on a baking sheet for 8‑10 minutes, or until warmed through and the cheese is melty again. The trick to reheating without drying it out? A splash of water on the baking sheet creates a gentle steam that keeps the interior moist while the exterior crisps up.