The first time I baked this apple streusel bread, the kitchen smelled like a cozy autumn market, even though it was a bright summer afternoon. I remember pulling the loaf out of the oven, the golden crust crackling softly as I lifted the pan, and a cloud of fragrant steam—sweet apples, warm cinnamon, and buttery crumbs—rising like a comforting hug. My family gathered around the table, each of us reaching for a slice before the butter could even melt, and that moment became a ritual we still repeat whenever we need a little home‑made comfort. That memory is why I’m so excited to share this recipe with you, because it’s not just a loaf; it’s a story you can write into your own kitchen, one warm bite at a time.
What makes this apple streusel bread stand out from the countless “quick breads” you see online is the balance of textures and flavors. The interior stays moist and tender thanks to the perfect blend of apples and milk, while the crumbly streusel topping adds a buttery crunch that sings with caramelized sugar and spice. I’ve spent years tweaking the ratio of flour to whole wheat, the amount of cinnamon, and the temperature of the butter for the streusel—each adjustment brought me closer to the loaf that feels both rustic and refined. And the best part? You don’t need any fancy equipment; a simple 9‑by‑5‑inch loaf pan does the trick, making it truly accessible for busy weeknight bakers.
But wait—there’s a secret twist hidden in step four that will transform the crumb from merely soft to luxuriously airy, and I’ll reveal it just a little later. Have you ever wondered why some breads rise beautifully while others stay dense and flat? The answer lies in a tiny detail that many home cooks overlook, and once you master it, you’ll never look back. Trust me, once you try this, you’ll be the one sharing the tip at every family gathering.
Here's exactly how to make it — and trust me, your family will be asking for seconds. Grab your favorite apples, preheat the oven, and get ready to create a loaf that smells like a hug from the inside out. Let’s dive into the details, because every great recipe starts with a little science, a pinch of love, and a whole lot of curiosity.
🌟 Why This Recipe Works
- Flavor Depth: The combination of tart Granny Smith apples and sweet honeycrisp creates a balanced flavor profile that sings with each bite, while the brown sugar in the streusel adds caramel notes that deepen the overall taste.
- Texture Harmony: Moist, tender crumb meets a crisp, buttery crumble on top, offering a delightful contrast that keeps you reaching for more.
- Ease of Preparation: All steps are straightforward, requiring only basic mixing bowls and a loaf pan, making it perfect for beginner bakers or busy families.
- Time Efficiency: With a total time of just 45 minutes, you get a bakery‑quality loaf without spending the whole day in the kitchen.
- Versatility: This bread can be served for breakfast, as a snack, or even a light dessert, paired with coffee, tea, or a scoop of vanilla ice cream.
- Nutrition Balance: Using whole‑grain flour options and real fruit adds fiber and vitamins, while the modest amount of sugar keeps it sweet without being overwhelming.
- Ingredient Quality: Fresh apples, real butter, and pure vanilla extract ensure that every component shines, creating a wholesome, satisfying loaf.
- Crowd‑Pleasing Factor: The familiar flavors of apple and cinnamon make this loaf a hit with both kids and adults, turning any gathering into a cozy celebration.
🥗 Ingredients Breakdown
The Foundation
All‑Purpose Flour forms the structural backbone of the bread, providing the gluten network that traps air and gives the loaf its rise. If you’re looking to add a nuttier, heartier flavor, consider swapping half of the flour for whole wheat; it adds a subtle earthiness without compromising the crumb’s tenderness. The flour also absorbs the moisture from the apples and milk, ensuring the loaf stays moist throughout baking. Choosing a high‑quality, unbleached flour will give you a cleaner taste and a more consistent texture.
Granulated Sugar not only sweetens the batter but also contributes to the browning of the crust through caramelization. If you prefer a deeper, almost toffee‑like flavor, you can replace half of the granulated sugar with brown sugar, which contains molasses. This small tweak adds a hint of richness that pairs beautifully with the apples. Remember, the sugar in the streusel topping also plays a crucial role in creating that signature crackly top.
Aromatics & Spices
Cinnamon is the star spice here, delivering warm, sweet notes that complement the apples perfectly. I always toast the cinnamon briefly in a dry pan before adding it to the batter; this awakens its essential oils and intensifies the aroma. A pinch of nutmeg or allspice can be added for extra depth, but be careful not to overpower the natural apple flavor. The vanilla extract adds a subtle, sweet aroma that ties all the flavors together, making each bite feel cohesive and comforting.
Eggs serve as the binding agent, providing structure and moisture. Using room‑temperature eggs helps them incorporate more smoothly into the batter, resulting in a more even crumb. If you’re avoiding eggs, a mixture of flaxseed meal and water (1 tablespoon flaxseed + 3 tablespoons water per egg) works as a vegan alternative, though the texture will be slightly denser.
The Secret Weapons
Butter is the hero of the streusel topping, delivering that melt‑in‑your‑mouth crumbly texture. Make sure the butter is cold and cut into small cubes before mixing with the flour and sugar; this creates tiny pockets of fat that bake into a crisp, buttery crumble. Milk adds moisture and richness to the batter, making the crumb soft and tender. Whole milk is ideal for its fat content, but you can substitute any dairy or non‑dairy milk if you have dietary restrictions.
Baking Powder and Baking Soda work together as leavening agents. Baking soda reacts with the acidity from the apples and any brown sugar, creating bubbles that help the loaf rise, while baking powder provides an extra lift for a light, airy texture. Using both ensures the bread isn’t heavy and that the crumb stays fluffy even after cooling.
Finishing Touches
When it comes to the apples themselves, choosing the right variety makes a world of difference. Firm apples like Granny Smith hold their shape during baking, providing a pleasant bite, while sweeter varieties like Fuji add natural sweetness that reduces the need for extra sugar. A mix of tart and sweet apples creates a balanced flavor that’s neither too sharp nor overly sugary. Peel the apples if you prefer a smoother texture, but leaving the skins on adds extra fiber and a lovely speckled appearance.
Finally, a pinch of sea salt amplifies all the flavors, rounding out the sweetness and enhancing the spice notes. It’s a tiny addition, but it makes the difference between good and unforgettable. With your ingredients prepped and ready, let's get cooking. Here's where the fun really begins...

🍳 Step-by-Step Instructions
Preheat your oven to 350°F (175°C) and lightly grease a 9‑by‑5‑inch loaf pan with butter or non‑stick spray. While the oven warms, line a large mixing bowl with parchment paper to make later cleanup a breeze. The moment the oven reaches temperature, you’ll hear a faint hum that signals it’s ready for the batter, and that anticipation is half the fun.
Dice the apples into ½‑inch cubes, then toss them with 1 tablespoon of lemon juice and 1 tablespoon of granulated sugar. This step not only prevents browning but also adds a subtle tang that balances the sweetness. Let the apples sit while you prepare the dry ingredients; the aroma of fresh apples will already start to fill the kitchen.
In a separate bowl, whisk together 2 cups of all‑purpose flour, 1 ½ teaspoons baking powder, ½ teaspoon baking soda, and 1 ½ teaspoons ground cinnamon. Add a pinch of sea salt. Whisking ensures the leavening agents are evenly distributed, which is crucial for a uniform rise.
💡 Pro Tip: Sift the flour mixture to incorporate air, making the crumb even lighter.In a third bowl, beat 2 large eggs until pale and frothy, then whisk in ½ cup whole milk, ¼ cup melted unsalted butter (cooled slightly), 1 teaspoon vanilla extract, and ¼ cup granulated sugar. The mixture should look glossy and slightly thick. This is the moment where the batter starts to feel luxurious; you’ll notice the scent of vanilla rising as you stir.
Gently fold the dry flour mixture into the wet batter, using a rubber spatula. Stir just until combined; over‑mixing will develop too much gluten and make the bread dense. When you see streaks of flour disappearing and a smooth batter forming, you’ve hit the sweet spot.
⚠️ Common Mistake: Mixing the batter for too long creates a tough crumb. Stop as soon as the flour disappears.Fold the apple pieces into the batter, distributing them evenly. You’ll hear a soft “thud” as the apples settle, and the batter will take on a speckled appearance. This step is where the fruit’s natural juices mingle with the batter, creating pockets of caramelized apple goodness.
For the streusel topping, combine ½ cup all‑purpose flour, ¼ cup brown sugar, ¼ cup cold unsalted butter (cut into small cubes), and 1 teaspoon cinnamon. Using your fingertips, rub the butter into the dry ingredients until the mixture resembles coarse crumbs. The texture should feel like wet sand—tiny clumps of butter surrounded by flour and sugar.
Pour the batter into the prepared loaf pan, smoothing the top with a spatula. Sprinkle the streusel evenly over the surface, pressing it down lightly so it adheres during baking. As you spread the topping, you’ll notice the contrast between the smooth batter and the gritty crumble—visual anticipation builds.
Place the loaf in the preheated oven and bake for 30‑35 minutes, or until a toothpick inserted into the center comes out clean and the top is a deep golden brown. Around the 20‑minute mark, you’ll see the streusel start to caramelize and the edges of the loaf puff up, releasing a sweet, buttery aroma that fills the whole house. If the top browns too quickly, loosely tent it with foil to prevent burning while the center finishes cooking.
Remove the bread from the oven and let it cool in the pan for 10 minutes before transferring it to a wire rack. This brief rest lets the steam settle, preventing the crumb from becoming soggy. As the loaf cools, the scent of apples and cinnamon will linger, inviting you to slice a piece while it’s still warm.
💡 Pro Tip: Serve the loaf with a dollop of whipped cream or a drizzle of caramel sauce for an extra indulgent touch.
And there you have it! But before you dig in, let me share some tips that will take this from great to absolutely unforgettable...
🔐 Expert Tips for Perfect Results
The Taste Test Trick
Before you bake the entire loaf, bake a tiny “test spoonful” of batter on a parchment square for 8‑10 minutes. This mini‑slice lets you gauge the sweetness and spice level, so you can adjust the cinnamon or sugar before committing to the full batch. I once under‑spiced a batch and the test bite saved the day, allowing me to add an extra pinch of cinnamon without over‑mixing the batter.
Why Resting Time Matters More Than You Think
Allow the batter to rest for 10 minutes after mixing the wet and dry components. This short pause lets the flour fully hydrate, resulting in a softer crumb and a more uniform rise. The rest period also gives the leavening agents a chance to start reacting, which contributes to that airy texture we all love.
The Seasoning Secret Pros Won’t Tell You
A pinch of sea salt sprinkled over the streusel just before baking amplifies the caramel flavors and balances the sweetness. Professional bakers often add this tiny amount at the very end because it creates a subtle contrast that makes the sweet notes pop. Trust me, that dash of salt is the silent hero of this recipe.
Butter Temperature is Everything
Cold butter for the streusel creates those coveted flaky pockets, while melted butter in the batter ensures moisture and richness. If you accidentally use softened butter for the topping, the crumb will turn out dense and greasy. Keep the butter straight from the fridge, and you’ll hear that satisfying crackle as the streusel bakes.
Don’t Forget the Steam
Place a small oven‑safe dish of water on the lower rack while the loaf bakes. The steam generated helps the crust stay tender on the inside while still achieving a golden, crisp exterior. I discovered this trick when my first loaf turned out a bit dry; the steam rescued the texture and gave the crust a beautiful shine.
🌈 Delicious Variations to Try
One of my favorite things about this recipe is how versatile it is. Here are some twists I've tried and loved:
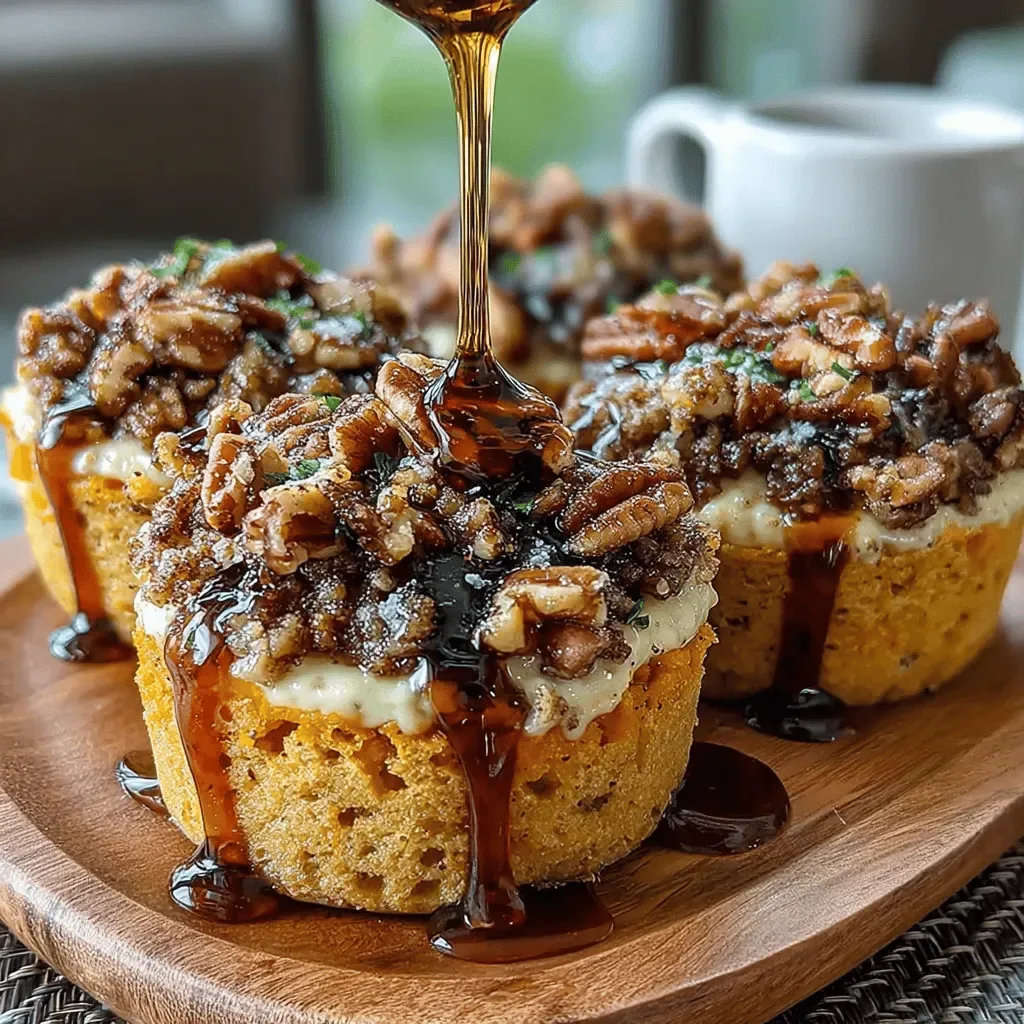
Maple‑Pecan Crunch
Replace half of the brown sugar in the streusel with pure maple syrup and fold in ¼ cup toasted pecans. The maple adds a deep, woodsy sweetness while the pecans contribute a buttery crunch that elevates the texture.
Cranberry‑Orange Zest
Add ½ cup dried cranberries and the zest of one orange to the batter. The tart cranberries contrast the sweet apples, and the orange zest injects a bright citrus note that makes the loaf feel festive.
Chocolate Chip Surprise
Stir in ½ cup mini dark chocolate chips into the batter for a decadent surprise. The chocolate melts into pockets of gooey richness that pair beautifully with the cinnamon‑spiced apples.
Whole Wheat & Oat Boost
Swap ¼ cup of the all‑purpose flour for rolled oats and use half whole wheat flour. This adds a hearty, nutty flavor and a slightly chewier texture, making the loaf more filling for breakfast.
Spiced Rum Glaze
After the bread cools, brush it with a glaze made from ¼ cup powdered sugar, 1 tablespoon milk, and ½ teaspoon spiced rum. The glaze adds a glossy finish and a subtle adult‑only kick that’s perfect for holiday gatherings.
📦 Storage & Reheating Tips
Refrigerator Storage
Wrap the cooled loaf tightly in plastic wrap or store it in an airtight container. It will stay fresh for up to 5 days, and the flavors actually deepen as the bread sits. If you notice any surface drying, lightly brush the top with melted butter before reheating.
Freezing Instructions
Slice the loaf into individual servings, wrap each slice in parchment paper, then place them in a freezer‑safe zip‑top bag. The bread freezes well for up to 3 months. To thaw, simply let a slice sit at room temperature for 15 minutes or warm it directly in the toaster.
Reheating Methods
To revive that fresh‑out‑of‑the‑oven texture, preheat your oven to 300°F (150°C), place the slice on a baking sheet, and warm for 8‑10 minutes. For a quick microwave fix, cover the slice with a damp paper towel and heat for 20‑30 seconds. The trick to reheating without drying it out? A splash of milk or a dab of butter on the slice before heating keeps it moist and flavorful.